Pre-Wedding Walkthrough Coordination for Planners
Pre-Wedding Walkthrough Coordination for Planners
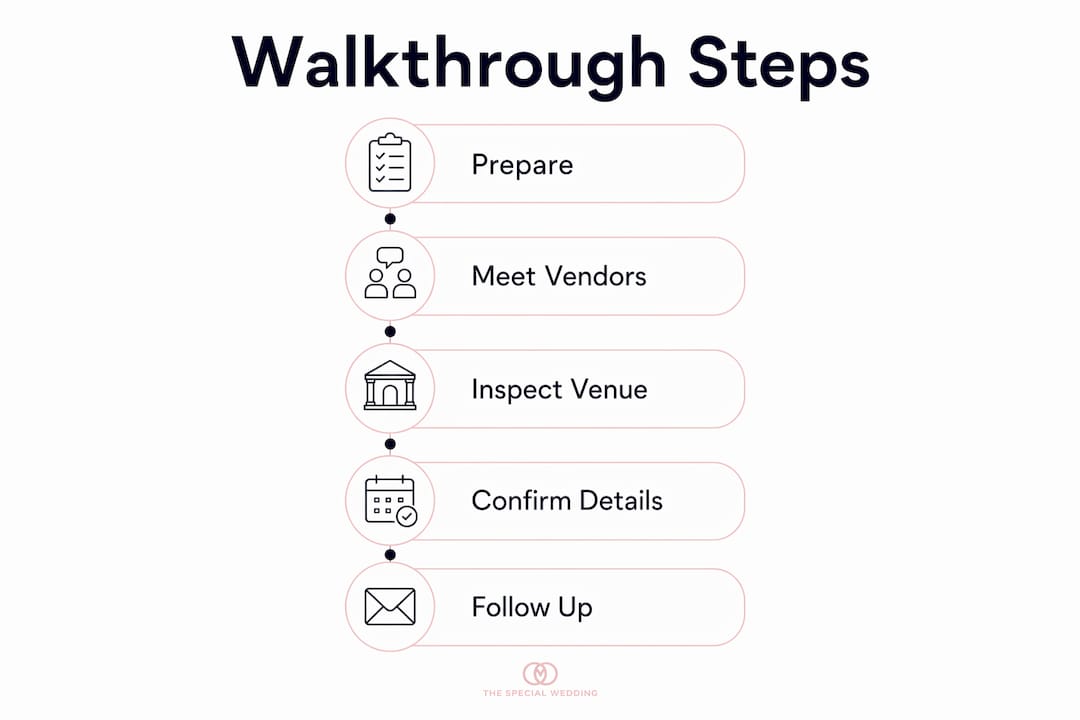
The role of pre-wedding walkthrough coordination is to convert a venue visit into a fully operational execution plan; you are not touring a space — you are stress-testing it. A professional coordinator uses the walkthrough to confirm vendor load-in paths, verify power availability, lock down the rain plan, and identify every gap between what the venue promised and what the day actually requires. The deliverable is not a good feeling. It is a documented, distributed action list and an updated timeline that every vendor can follow without calling you on the morning of the wedding.
Your highest-value tasks during the walkthrough:
- Confirm load-in access: door widths, service elevator availability, and the sequence in which vendors enter.
- Verify power: outlet locations, amperage, and who supplies extension cords or power strips.
- Walk the rain plan with the venue rep and get the decision timeline in writing.
- Map guest flow from arrival through ceremony, cocktail hour, and reception to catch bottlenecks before they happen.
- Clarify vendor parking and confirm it does not conflict with guest parking or load-in zones.
The meeting should produce three immediate outputs: an annotated floor plan, an updated vendor timeline, and an action-item tracker with named owners and deadlines. Expect roughly two hours of post-meeting administrative work before those documents are ready to distribute.
Table of Contents
- What does pre-wedding walkthrough coordination actually mean?
- When should you schedule the walkthrough, and who needs to be there?
- What should you verify on-site? A category-by-category checklist
- How do you clarify venue vs. vendor responsibilities?
- How do walkthrough findings become a vendor-synced timeline?
- What blind spots do walkthroughs typically uncover?
- Which tools help you document and share walkthrough outcomes?
- A ready-to-use walkthrough agenda and run-of-show conversion steps
- Key Takeaways
- The walkthrough habit that actually changes how your days run
- Thespecialwedding keeps your walkthrough outputs in one place
- Useful sources for further reading
What does pre-wedding walkthrough coordination actually mean?
A pre-wedding walkthrough is a structured, operational meeting held at the venue before the wedding day. It is not a site tour, and it is not a decorative preview. The distinction matters because the purpose, the participants, and the expected outcomes are entirely different.
| Dimension | Casual site tour | Professional final walkthrough |
|---|---|---|
| Purpose | Evaluate the venue aesthetically | Confirm logistics and operational feasibility |
| Who leads | Venue sales rep | Primary coordinator |
| Attendees | Couple, family, friends | Coordinator, couple, venue ops rep, key vendors |
| Outcome | General impressions | Documented action list, updated floor plan, confirmed timeline |
| Timing | Pre-booking | ~30 days before the wedding |
The professional walkthrough is a technical meeting. You are confirming that the space can physically support the plan: that the caterer’s truck fits through the service entrance, that the DJ has enough power without tripping a breaker, that the ceremony chairs clear the fire exit. Operational blind spots — noise curfews, hidden load-in obstacles, guest flow problems — rarely surface during a sales presentation. They surface here, when you have time to fix them.
The deliverables that should come out of every walkthrough:
- An updated, annotated floor plan reflecting confirmed furniture placement and vendor zones.
- Vendor confirmations with corrected arrival times and load-in sequences.
- A documented rain plan with a named decision-maker and a call deadline.
- A revised master timeline incorporating any changes discovered on-site.
When should you schedule the walkthrough, and who needs to be there?
Schedule the final walkthrough about 30 days before the wedding. That window gives you time to order additional rentals, fill vendor gaps, and revise the timeline without the pressure of wedding week. Doing it earlier is fine; doing it later compresses your ability to act on what you find.
Who must attend:
- Primary coordinator (you lead the meeting)
- The couple or their designated decision-maker
- Venue operations representative (not the sales contact — the person who will be on-site that day)
- Caterer or catering manager, if food service involves the kitchen or a specific setup area
- AV or lighting lead, if power and rigging need to be confirmed on-site
- Rental company rep, if furniture placement or tent installation is involved
Who to leave off the list:
- Extended family members
- Bridesmaids or groomsmen
- Vendors whose work is self-contained and does not depend on venue infrastructure (photographer, officiant, florist — unless floral installations require structural confirmation)
Before the meeting, prepare and bring: vendor contracts with confirmed arrival times, your current floor plan draft, the rough timeline, and a copy of the venue’s policies on noise, curfews, and vendor access. Limiting attendance to essential decision-makers keeps the session technical and efficient. Every additional person who does not have a decision to make adds social friction and slows the meeting down.
Pro Tip: Send a pre-meeting agenda to all attendees 48 hours in advance. List the specific decisions that need to be made and the documents each person should bring. A prepared room moves twice as fast.

A typical walkthrough runs about an hour to an hour and a half on-site, plus approximately two hours of post-meeting administrative work afterward. Build that into your client’s expectations and your own schedule.
What should you verify on-site? A category-by-category checklist
Treat the walkthrough as a physical audit. Walk every space the wedding will use and confirm each item below. Record findings on-site — voice memos, photos, or a shared notes app — and convert them to assigned action items within 24 hours.
Ceremony space
- Confirmed chair count and layout with aisle width measured
- Microphone placement and speaker coverage for the officiant and readers
- Noise curfew or sound restrictions for the ceremony hour
- Backup location if the ceremony is outdoors (and who triggers the move)
Reception space
- Table count and layout matching the current floor plan
- Dance floor dimensions and placement relative to speakers
- Bar placement and service path from bar to tables
- Lighting zones and dimmer control locations
Load-in and vendor access
- Service entrance dimensions (door width and height for large items)
- Service elevator availability and weight limit
- Load-in sequence and time windows for each vendor
- Vendor parking location and distance from load-in entrance
AV and power
- Number and location of accessible power outlets in each zone
- Amperage available per circuit (critical for caterers and AV)
- Who supplies extension cords and power strips
- Generator availability or requirement
Catering and kitchen
- Kitchen access hours and any shared-use restrictions
- Trash and recycling removal responsibility
- Staging area for passed appetizers and cocktail hour service
- Dietary accommodation station placement
Guest flow, safety, and accessibility
- Arrival path from parking to ceremony entrance
- Restroom locations and ADA accessibility confirmation
- Emergency exit routes and whether they conflict with décor placement
- Elevator access for elderly or mobility-limited guests
Parking
- Total guest parking spaces and overflow plan
- Vendor parking separate from guest parking
- Valet staging area if applicable
Pro Tip: Walk the load-in route yourself, physically. Measure the service door if you have any doubt. A caterer who discovers on the wedding morning that their cart does not fit through the entrance will cost you an hour you do not have.
| Category | Item to confirm | Owner if action needed |
|---|---|---|
| Power | Outlet count and amperage per zone | Venue ops + AV vendor |
| Load-in | Service door dimensions | Venue ops |
| Rain plan | Decision-maker name and call deadline | Coordinator + venue rep |
| Parking | Vendor vs. guest separation | Venue ops |
| ADA access | Restroom and path confirmation | Venue ops |
| Noise | Curfew time and enforcement | Venue ops |
After the walkthrough, any item that requires a contract change, a rental addition, or a vendor adjustment gets a named owner and a deadline. Do not leave the meeting with open items and no assigned responsibility.
How do you clarify venue vs. vendor responsibilities?
Clients frequently assume that the venue manages every logistical detail. They do not. The venue manages the facility. You manage the people and the plan. That boundary needs to be documented explicitly, because the overlap zones are where day-of confusion lives.
Confirm with the venue rep:
- Who sets up and breaks down venue-owned furniture (chairs, tables, linens)?
- Who handles HVAC adjustments during the event?
- Who is the on-site security contact, and what is their protocol for vendor disputes?
- Who controls the sound system if the venue provides in-house audio?
- What is the venue’s policy on vendor-supplied extension cords and open flames?
Confirm with vendors:
- Who supplies extension cords, power strips, and cable covers?
- Who is responsible for moving furniture not owned by the venue?
- Who removes floral installations at the end of the night?
- What is each vendor’s load-out window, and does it conflict with the venue’s closing time?
A vendor contact sheet prepared before or during the walkthrough should include: vendor name, role, cell phone number, arrival time, load-in needs, and load-out window. Keep it in a shared document every team member can access on the day.
When you need to clarify responsibility with the venue rep, be direct and specific. Instead of “Who handles setup?” try: “The contract says the venue provides round tables. Can you confirm your team places them in the positions on this floor plan, or does our rental company need to do that?” Specific questions produce specific answers. Vague questions produce assumptions, and assumptions produce problems.
The coordinator’s role is to hold both sides accountable to documented commitments, not to absorb responsibility for tasks that belong to the venue or a vendor.
How do walkthrough findings become a vendor-synced timeline?
The walkthrough produces raw findings. Your job is to convert them into a single, shared timeline that every vendor can execute without calling you for clarification. Here is the sequence:
- Capture issues on-site. Use a shared notes app or voice memos. Photograph anything that needs documentation — outlet locations, service door dimensions, the rain plan setup area.
- Assign owners within 24 hours. Every open item gets a name and a deadline. “Venue to confirm amperage on the east wall by Friday” is an action item. “Check power” is not.
- Adjust the timeline. Map each walkthrough finding to a specific timeline entry. A power check that reveals the AV vendor needs a dedicated circuit means the AV team arrives 30 minutes earlier for a longer soundcheck. That change ripples into the caterer’s setup window and the couple’s first-look timing.
- Distribute and confirm. Send the updated timeline to every vendor and request written confirmation. A reply email counts. Silence does not.
- Version control. Date-stamp every timeline revision. When you send an update, note what changed and why. Vendors who receive version 3 of a timeline need to know what is different from version 2.
Prioritize timeline entries in this order: ceremony start time, venue entry, venue exit, and reception end time — then layer in meal timing, photo windows, and music curfews. That sequence keeps the structural anchors fixed while allowing flexibility in the middle of the day.
Sample timeline excerpt — walkthrough note converted to vendor call-times:
Shared timelines reduce vendor confusion and cut the number of same-day calls you field. When every vendor is working from the same version of the same document, the day runs on information, not improvisation.
What blind spots do walkthroughs typically uncover?
The walkthrough’s value is proportional to how hard you look for problems. The objective is to surface operational issues that sales visits miss. These are the blind spots that show up most often:
- Load-in bottlenecks. Two vendors scheduled to arrive at the same time, sharing one service entrance. Fix: stagger arrival times by 30 minutes and confirm the sequence in writing with each vendor.
- Inadequate power. The venue’s circuit map does not match the actual outlet locations. Fix: walk the space with the AV vendor present, or request the venue’s electrical diagram before the walkthrough.
- Vendor parking conflicts. Vendor vehicles blocking guest parking or the valet lane. Fix: designate a vendor parking zone on the floor plan and include it in every vendor’s call sheet.
- Inaccessible restrooms. The nearest ADA-compliant restroom is on a different floor with no elevator signage. Fix: add directional signage to the coordinator’s supply kit and confirm the venue’s responsibility for placement.
- Noise curfews. The venue’s contract states 10:00 PM, but the local ordinance is 9:00 PM. Fix: confirm the rain plan and curfew details in writing with the venue rep, and build the timeline around the earlier limit.
- Weather contingencies without a decision protocol. The couple knows there is a tent option, but no one has defined who makes the call or by what time. Fix: document the decision-maker’s name, the deadline for the call, and the exact movement plan.
A brief case example: A coordinator running a walkthrough at an outdoor garden venue discovered that the only path from the catering kitchen to the reception tables crossed directly through the ceremony aisle. The venue had never flagged it because the sales tour happened before the floor plan was finalized. The fix — a temporary service path along the perimeter fence — took 20 minutes to plan on-site and cost nothing. Discovered on the wedding morning, it would have required moving the entire ceremony setup.
Pro Tip: Document your last-resort contingencies in a single section of the master timeline labeled “If/Then.” “If rain begins before 3:00 PM, venue rep calls coordinator to trigger tent setup. Decision must be made by 1:00 PM.” That sentence eliminates a 10-minute phone chain on the wedding day.
Which tools help you document and share walkthrough outcomes?
The right tool set depends on how many events you manage and how your team shares information. The goal is a single source of truth — one place where the floor plan, the timeline, the action-item tracker, and the vendor contact sheet all live together.
- Floorplan editors. Allseated is commonly used by planners to finalize layouts and share annotated floor plans with vendors and venues. Social Tables is another option for larger events with complex seating.
- Timeline apps. Planning Pod and Aisle Planner both include timeline builders that allow vendor-specific views. A vendor sees only their call-times and tasks, not the full operational document.
- Shared documents. Google Docs or Notion work well for the action-item tracker and vendor responsibility matrix. They update in real time and require no login for vendors who receive a shared link.
- Photo annotation tools. Google Photos with comments, or Markup on iOS, lets you annotate venue photos on-site and share them immediately. Useful for flagging outlet locations, load-in paths, and setup zones.
- Vendor portals. Platforms that include a coordinator access portal allow you to push timeline updates directly to vendors without a separate email chain.
For planners managing multiple events, avoid tool fragmentation. If your floor plan lives in one app, your timeline in another, and your action items in a third, you will spend more time syncing tools than managing events. Choose a platform that handles at least three of these functions natively, and build your workflow around it.
Templates to maintain after every walkthrough:
- Annotated floor plan PDF with vendor zones labeled
- Vendor responsibility matrix (who owns what, by when)
- Action-item tracker with owner names and deadlines
- Updated master timeline with version date
Store all artifacts in a single event folder, named by event date and couple name, accessible to every team member. Archive it after the wedding. When a dispute arises six months later about who was responsible for a specific setup task, you will have the documentation.
A ready-to-use walkthrough agenda and run-of-show conversion steps
60–90 minute walkthrough agenda
- 0:00–0:10 — Sit-down introduction (conference room or lobby). Coordinator introduces all attendees, states the meeting objective, and confirms the agenda. Venue rep confirms the day-of contact name and cell number.
- 0:10–0:25 — Policy and logistics review. Venue rep covers: noise curfew, vendor access hours, load-in sequence, parking, and any policy changes since the contract was signed.
- 0:25–0:50 — Physical walkthrough. Coordinator leads the group through ceremony space, cocktail area, and reception room. Confirm outlet locations, furniture placement, load-in path, rain plan location, and guest flow. Photograph everything.
- 0:50–1:10 — Vendor-specific confirmations. Caterer confirms kitchen access and staging. AV confirms power and rigging. Rental rep confirms delivery window and furniture placement responsibility.
- 1:10–1:20 — Open items and action assignments. Coordinator reads back every open item captured during the walk. Each item gets a named owner and a deadline before the meeting ends.
- 1:20–1:30 — Wrap-up. Confirm next communication touchpoint. Coordinator commits to distributing the updated timeline and annotated floor plan within 48 hours.
Printable on-site checklist (doubles as action-item tracker)
- Ceremony space confirmed (layout, sound, backup location)
- Reception layout confirmed (tables, dance floor, bar)
- Load-in path walked and documented
- Power outlets mapped by zone
- Rain plan documented with decision-maker and deadline
- Vendor parking confirmed and separated from guest parking
- ADA access confirmed for restrooms and key paths
- Noise curfew confirmed and entered in timeline
- All open items assigned with owner and deadline
Converting walkthrough notes to the run-of-show
The run-of-show is the operational document vendors execute on the day. Here is how walkthrough findings feed into it:
- Pull every action item from the tracker and confirm it is resolved before finalizing the run-of-show.
- Enter confirmed vendor arrival times, load-in sequences, and setup windows into the timeline in chronological order.
- Add the rain plan trigger and decision deadline as a conditional block at the top of the document.
- Send the draft run-of-show to the venue rep and lead vendors for approval. Request written sign-off within five business days.
- Distribute the final version to all vendors and the couple no later than seven days before the wedding.
For vendor scheduling details that fall outside the walkthrough scope, confirm them in a separate vendor call and document the outcomes in the same shared folder.
Key Takeaways
A thorough pre-wedding walkthrough, scheduled about 30 days out, converts venue assumptions into documented operational commitments that protect the wedding day from preventable failures.
| Point | Details |
|---|---|
| Schedule 30 days out | The 30-day window gives you time to fix rental gaps, adjust vendor timelines, and resolve venue issues before wedding week. |
| Limit attendance | Bring only essential decision-makers; too many attendees turns a technical session into a social visit. |
| Document every decision | The single most effective habit is a shared, living document that assigns every open item a named owner and a deadline. |
| Convert findings within 48 hours | Produce three outputs after every walkthrough: an annotated floor plan, an action-item tracker, and an updated vendor timeline. |
| Thespecialwedding centralizes it all | The platform hosts timelines, floor plans, vendor portals, and action-item trackers in one workspace, replacing scattered tools with a single source of truth. |
The walkthrough habit that actually changes how your days run
The coordinators who have the fewest same-day crises share one habit: they treat the walkthrough as the last moment they can fix something cheaply. Every problem found on-site costs a phone call and a calendar adjustment. The same problem found on the wedding morning costs an hour, a vendor dispute, and a couple’s trust.
The conventional wisdom is that experience makes you better at handling surprises. That is partly true. But the better coordinators are not better at handling surprises — they are better at eliminating them. The walkthrough is where that elimination happens. A coordinator who walks the load-in route, tests the power, and gets the rain plan in writing is not being paranoid. They are doing the job correctly.
One habit worth adopting immediately: within 24 hours of every walkthrough, send a single follow-up email to all attendees that lists every decision made and every open item assigned. Not a formal report. A plain-language summary. “We confirmed the AV team arrives at noon on circuit A. Venue to send the electrical diagram by Thursday. Rain plan call goes to [venue rep] by 1:00 PM if weather is forecast.” That email becomes the record. Unclear ownership is the single greatest cause of last-minute stress, and a next-morning summary email eliminates most of it before it starts.
The planners who skip this step — who leave the walkthrough with good intentions and no written record — are the ones fielding calls at 7:00 AM on the wedding day asking who handles the chairs.
Thespecialwedding keeps your walkthrough outputs in one place
Running walkthroughs across multiple events means managing a growing stack of floor plans, action-item trackers, vendor timelines, and confirmation emails. Thespecialwedding is built for exactly that workflow. The platform lets you capture walkthrough outputs, annotate floor plans, assign action items with deadlines, and push timeline updates to vendors through a single workspace — no switching between a notes app, a spreadsheet, and three email threads.
After the walkthrough, every deliverable lives in one event folder: the annotated floor plan, the vendor responsibility matrix, the updated timeline, and the archived confirmations. When a vendor questions a call-time six days before the wedding, you pull up the record in seconds. For planners managing multiple events simultaneously, the platform’s vendor directory also helps you identify local rental and lighting partners quickly when a walkthrough reveals a gap you need to fill fast.
If you are ready to replace scattered tools with a workflow that actually holds up under pressure, explore Thespecialwedding’s planning platform and see how it fits your coordination process.
Useful sources for further reading
These are the primary references used in this article. Each one offers a specific type of value for coordinators building or refining their walkthrough process.
-
Why I Conduct My Final Venue Walkthrough 30 Days Before the Wedding — Southern Productions. The practitioner rationale for the 30-day standard, including the case for limiting attendance and the operational focus of the meeting. Useful for explaining the timing decision to clients.
-
What Happens During Your Final Venue Walkthrough? — Before the Vows. A coordinator-led walkthrough structure from a working planning firm, covering the sit-down review, physical walk, and logistics confirmation sequence. Good reference for building your own agenda.
-
Wedding Venue Final Walkthrough/Tour — Elisabeth Kramer. Covers timeline prioritization order and the two-hour post-meeting administrative estimate. Also references Allseated as a commonly used floorplan tool.
-
Final Walkthrough Checklist with Your Venue — HelloPrenup. Addresses the venue vs. coordinator responsibility boundary and the importance of documenting weather contingency plans with a named decision-maker and deadline.
-
Destination Wedding Pre-Visit — SPB. Frames the walkthrough as a risk-mitigation tool and recommends simulating vendor load-in and guest paths as a stress test. Useful for the blind-spots section.
-
How to Know If a Destination Wedding Site Visit Is Worth the Trip — KP Travel Group. Distinguishes between a pre-booking site visit and a final logistics walkthrough — helpful context for coordinators advising couples on when each type of visit is warranted.
For hard limits such as noise curfews, occupancy caps, and vendor access windows, always request written confirmation directly from the venue’s operations contact. Verbal assurances from a sales representative do not hold up on the wedding day.
Recommended
- Multi-Wedding Coordination: A Professional’s 2026 Guide | The Special Wedding Blog
- Coordinator Access to Wedding Portals: A Pro Guide | The Special Wedding Blog
- Build Your Wedding Day-of Coordination Timeline | The Special Wedding Blog
- Day-of Wedding Coordination Explained for Couples | The Special Wedding Blog
Free wedding planner templates
Skip the blank page — these templates ship with the form fields you actually need.
Browse all 9 free templates →