How to Build a Repeatable Wedding Day Timeline Workflow
How to Build a Repeatable Wedding Day Timeline Workflow
The fastest way to create consistent, error-free day-of timelines across multiple weddings is a SaaS workflow built on reusable templates, calendar integrations, and role-based team collaboration. Studios that adopt this approach report fewer vendor conflicts, shorter build times, and runsheets that hold up under day-of pressure. Your first move in the next 24 hours: create one master timeline template and connect it to your calendar. Everything else builds from there.
What success looks like in practice:
- Hours saved per wedding: Template-based setup cuts new-wedding configuration to roughly 15–20 minutes, according to project management guidance for wedding planners, versus the multi-hour manual builds most studios still run.
- Fewer vendor conflicts: A structured intake questionnaire feeds directly into auto-generated vendor instructions, reducing day-of briefings and follow-up calls.
- Consistent runsheets: Every timeline follows the same format, so your team and vendors know exactly where to look for critical information.
A typical wedding carries 50–100+ milestones across 10–14 vendors. Managing that at scale without a repeatable system means every new booking starts from scratch.
Key Takeaways
A repeatable, template-driven SaaS workflow is the most reliable way to produce consistent day-of timelines across multiple concurrent weddings without rebuilding from scratch each time.
| Point | Details |
|---|---|
| Build the master template first | A single master timeline template cuts per-wedding setup to roughly 15–20 minutes from multi-hour manual builds. |
| Lock venue access windows early | Treat bump-in/out windows as immovable constraints before drafting any ceremony or reception blocks. |
| Automate vendor confirmations first | Start with one automation domain, run dry runs with audit logs, then expand to client-facing workflows. |
| Deliver timelines 14 days out | Final runsheets to vendors 14 days before the event is the target SLA; client approval should be secured by day 21. |
| Thespecialwedding as implementation path | Thespecialwedding connects intake, vendor portals, team permissions, and calendar sync in one platform for multi-wedding studios. |
Table of Contents
- How do you create a wedding day timeline that works every time?
- What templates and reusable assets should your studio build first?
- Which automations eliminate the most manual handoffs?
- How should you set roles and permissions for team collaboration?
- How do you onboard vendors into the timeline workflow?
- What does a strong day-of runsheet actually include?
- How long does timeline creation take, and what ROI should you expect?
- How do you scale this workflow across 8–15 concurrent weddings?
- How do you migrate from spreadsheets to a SaaS timeline workflow?
- Why the “just use a spreadsheet” mindset costs studios more than they realize
- Thespecialwedding gives your studio a production-ready timeline system
- Sources
How do you create a wedding day timeline that works every time?
A six-step repeatable workflow gives your studio a production line for day-of timelines. Run it the same way for every wedding and the quality becomes predictable.
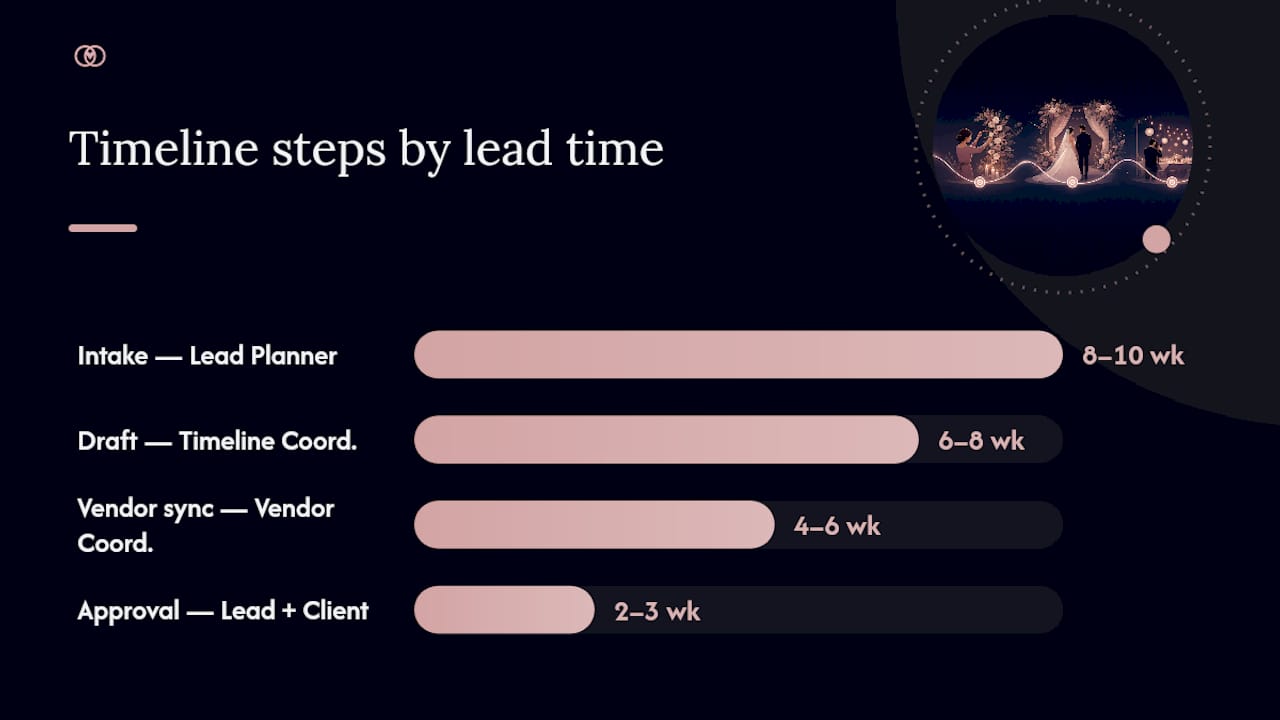
- Intake (8–10 weeks out) — Owner: Lead Planner. Send a structured questionnaire covering ceremony format, venue access windows, vendor list, and family logistics. A detailed intake form is the seed for every downstream document; structured questionnaires convert directly into auto-generated timelines and checklists, cutting revision cycles significantly.
- Draft (6–8 weeks out) — Owner: Timeline Coordinator. Pull the intake data into your master template. Lock venue access windows and vendor bump-in/out times first — these are immovable constraints that every other block must fit around.
- Vendor sync (4–6 weeks out) — Owner: Vendor Coordinator. Send each vendor their role-specific runsheet and request confirmation of arrival windows, kit needs, and insurance certificates. Audit supplier contracts for operational windows and request proof of public liability insurance at least a month before the event.
- Approval (2–3 weeks out) — Owner: Lead Planner + Client. Share the full timeline with the client through a portal. Collect feedback in one round, apply changes, and lock the document.
- Day-of run — Owner: Day-of Lead. Execute from the approved runsheet. All team members work from the same live document; no printed copies that go stale.
- Postmortem (within 48 hours) — Owner: Studio Director. Log what ran late, what vendors missed, and what template fields need updating. Feed findings back into the master template.
Pro Tip: Lock venue access windows in Step 2 before drafting any ceremony or reception blocks. Planners who draft ceremony timing first and then discover a 90-minute venue turnover window end up rebuilding the entire afternoon.
What templates and reusable assets should your studio build first?
Wedding timeline templates are the core asset that makes every new booking faster. Build these four first:
- Master wedding timeline template: One file with every standard block (getting ready, ceremony, cocktail hour, reception, send-off) using time variables so the same template works for a 4 PM ceremony or a 6 PM one.
- Vendor-specific runsheets: Stripped-down versions showing only the blocks relevant to that vendor category (catering, florals, photography, band). Auto-generated from the master after intake.
- Vendor contact cards: Name, company, cell, email, vehicle info, arrival window, and kit list in a single record per vendor.
- Kit and logistics checklists: What each team member carries on the day, mapped to their role.
For naming and versioning, use a consistent convention: [ClientLastName]_[EventDate]_Timeline_v[#]. Never overwrite a version; always increment. Store templates in a shared library organized by wedding type (elopement, micro-wedding, full-service) and service tier. When a new booking arrives, a structured intake form seeds the template automatically, so your coordinator is refining rather than building from zero.
Which automations eliminate the most manual handoffs?
Repetitive tasks consume 60–70% of planners’ workdays, and AI automation delivers average efficiency gains of roughly 45% within six months. The highest-impact integrations to prioritize:
- Google or Outlook calendar sync: Every timeline block pushes to the team calendar automatically. No manual entry, no missed calls.
- Client portal with approval workflow: Clients review and comment in one place; the planner sees a single approval status, not a thread of emails.
- Vendor confirmation triggers: When a vendor confirms their arrival window in the portal, the timeline updates and a confirmation receipt logs automatically.
- Automated reminders: Scheduled nudges go to vendors and clients at 6 weeks, 3 weeks, and 7 days out without the planner touching them.
A practical automation flow: intake form submitted → AI drafts timeline from master template → vendor notification emails sent → approval reminder scheduled → client signs off → day-of runsheet published to vendor portal. AI-powered timeline generation uses historical data, venue logistics, and vendor requirements to produce that first draft, which the planner then reviews and refines.
Pro Tip: Start automation with one domain only — vendor confirmations are the safest first target. Run dry runs with audit logs and approval lanes before expanding to client-facing automations. Connector-aware setups and phased rollouts prove ROI before you commit the full studio.
How should you set roles and permissions for team collaboration?
Clear role definitions prevent overwritten timelines and missed approvals. Assign these four roles in your platform:
- Creator: Builds the initial timeline from the master template. Can edit all fields. Typically the timeline coordinator.
- Editor: Can modify event blocks and vendor details but cannot publish or send vendor notifications. Typically an associate planner.
- Approver: Reviews and locks the final timeline. Can publish to the client portal. Typically the lead planner.
- Day-of Lead: Read-only access to the published runsheet plus the ability to log real-time notes. Cannot edit approved blocks.
Your shared dashboard should surface these fields for every active wedding: status (draft/in review/approved/live), last-updated timestamp, vendor confirmed count, and critical dependencies (venue access confirmed, catering headcount locked). For permissions, apply this checklist: only the Approver can publish a day-of timeline; only the Lead Planner or Studio Director can send mass vendor notifications; Editors cannot delete timeline blocks, only flag them for review. Coordinator portal access should be scoped tightly so day-of leads see what they need and nothing that could cause confusion under pressure.
How do you onboard vendors into the timeline workflow?
Every vendor in your system needs a profile that captures the operational details your timeline depends on. Collect these fields at onboarding:
- Bump-in window (earliest access time and latest setup-complete time)
- Bump-out window and pack-out deadline
- Kit and equipment list with vehicle/load-in requirements
- Primary contact name, cell, and email
- Emergency contact
- Certificate of insurance expiration date
Vendor portal permissions should show vendors their own schedule blocks, arrival windows, and contact cards — nothing else. They should not see client budget figures, other vendors’ contact details, or internal planner notes. For confirmations, use a two-message sequence: an initial request with their runsheet attached, and a 7-day-out reminder if no confirmation is logged. Shared vendor timelines reduce day-of friction significantly because every supplier arrives knowing exactly where to go and when.
For last-minute changes, keep a short message template ready: “Hi [Name], we’ve updated your arrival window to [time]. Please confirm receipt by [date]. Full updated runsheet is attached.” Sending a vendor-specific update rather than the full timeline keeps their attention on what changed.
What does a strong day-of runsheet actually include?
Every runsheet, regardless of format, needs these fields: time, duration, event block name, location, responsible team member, vendor involved, contact number, and kit or setup notes. Run sheets should log vendor contact, arrival time, install-ready time, installation location, and pack-out times, with 15–30 minute buffers between major installations to prevent cascading delays.
Planner view (minute-by-minute):
- 10:00 AM — Florist arrives, Main Entrance. Contact: [Name/Cell]. Install-ready by 11:30 AM.
- 10:15 AM — Catering team load-in, Kitchen Dock. Contact: [Name/Cell]. Buffet set by 4:30 PM.
- 11:00 AM — Band load-in, Ballroom Stage. Contact: [Name/Cell]. Sound check complete by 2:00 PM. Arrival and setup times for live bands are often the tightest constraint in the afternoon block.
- 2:00 PM — Buffer window. Venue turnover from ceremony to reception. No vendor activity in main hall.
Vendor strip (compact call sheet): Name, company, arrival time, location, setup-complete deadline, pack-out time, planner cell. One page, large font. Vendors carry this on the day.
Place buffer windows at venue turnover points and immediately after any vendor installation that feeds the next event block. A florist running 20 minutes late should not delay the ceremony start.
How long does timeline creation take, and what ROI should you expect?
Target SLA: deliver the final timeline to vendors 14 days before the event. Client approval should be secured no later than 21 days out to give vendors adequate notice.
Studios that implement AI automation and template reuse report average efficiency gains of roughly 45% and profit margin improvements of 8–12% within six months. For time management across concurrent weddings, the compounding effect matters: at 3.75 hours per wedding with a template-based workflow versus 8–10 hours manually, a studio running 12 weddings per month recovers roughly 50–75 hours monthly.
How do you scale this workflow across 8–15 concurrent weddings?
Batching is the key operational lever. Group similar tasks across all active weddings and run them in one focused session:
- Monday timeline audit: Review all active timelines for the next 30 days. Flag any missing vendor confirmations or unresolved client feedback.
- Wednesday vendor confirmation batch: Send all outstanding confirmation requests in one session. Log responses before end of day.
- Friday dashboard review: Check status fields across all events. Escalate any wedding within 21 days that lacks client approval.
Your multi-wedding coordination dashboard should surface: upcoming vendor confirmation deadlines, overdue task alerts, timeline version status, and client approval status per event.
For continuous improvement, run a postmortem within 48 hours of each wedding. Log: what ran late and why, which vendor fields were missing, and which template blocks needed day-of edits. Review postmortem logs monthly and update the master template quarterly. Studios that treat the master template as a living document improve timeline accuracy with each wedding cycle.

How do you migrate from spreadsheets to a SaaS timeline workflow?
A 6-week rollout keeps disruption low and adoption high.
Weeks 1–2: Data cleanup and template creation
- Audit existing spreadsheets and identify the fields used across all active weddings.
- Build the master timeline template and vendor contact card template in your new platform.
- Import active wedding data; archive completed events.
Weeks 3–4: Pilot run
- Select one upcoming wedding as the pilot. Run the full six-step workflow using only the new system.
- Assign roles and permissions. Test vendor portal access with one or two vendors.
- Run a dry run of all automations with audit logs enabled before going live.
Weeks 5–6: Staff training and full rollout
- Train all team members on their role-specific views and permissions.
- Onboard remaining active vendors to the portal.
- Set success criteria: timeline delivered on SLA for 100% of weddings, vendor confirmation rate above 90%, and zero timeline versions lost.
For solo planners building toward a team structure, start with the master template and one automation (vendor confirmations) before adding permissions layers.
Why the “just use a spreadsheet” mindset costs studios more than they realize
The conventional wisdom among newer studios is that spreadsheets are good enough until you hit a certain volume. That threshold never arrives cleanly. What actually happens is that errors accumulate quietly: a vendor gets the wrong arrival time, a client approval gets buried in email, a team member edits the wrong version of a timeline. None of these feel catastrophic individually. Together, they erode the studio’s reputation and the planner’s capacity to take on more weddings.
The real cost of a spreadsheet-based workflow is not the hours spent building timelines. It is the hours spent recovering from the gaps those timelines leave. A SaaS workflow with role-based permissions and vendor portals does not just save time on creation; it closes the gaps that cause day-of problems in the first place. Studios that make the switch consistently report that the first benefit they notice is not speed — it is confidence. The team knows the timeline is current, the vendors have confirmed, and the client has approved. That certainty is what lets a studio director take on the 12th wedding without losing sleep over the 11th.
Three lessons that matter most during adoption: prioritize vendor portal onboarding before client portal features, because vendor confirmation is where most day-of failures originate; resist the urge to automate everything in week one, because one well-tested automation builds more trust than five broken ones; and update the master template after every wedding, not quarterly, because the compounding accuracy gains are where the real ROI lives.
Thespecialwedding gives your studio a production-ready timeline system
Running 8, 12, or 15 weddings concurrently means your timeline workflow needs to work without you holding it together manually. Thespecialwedding connects client intake, vendor onboarding, customizable timelines, team permissions, and client portals in one workspace — replacing the spreadsheet stack with a system your whole team can operate from day one.
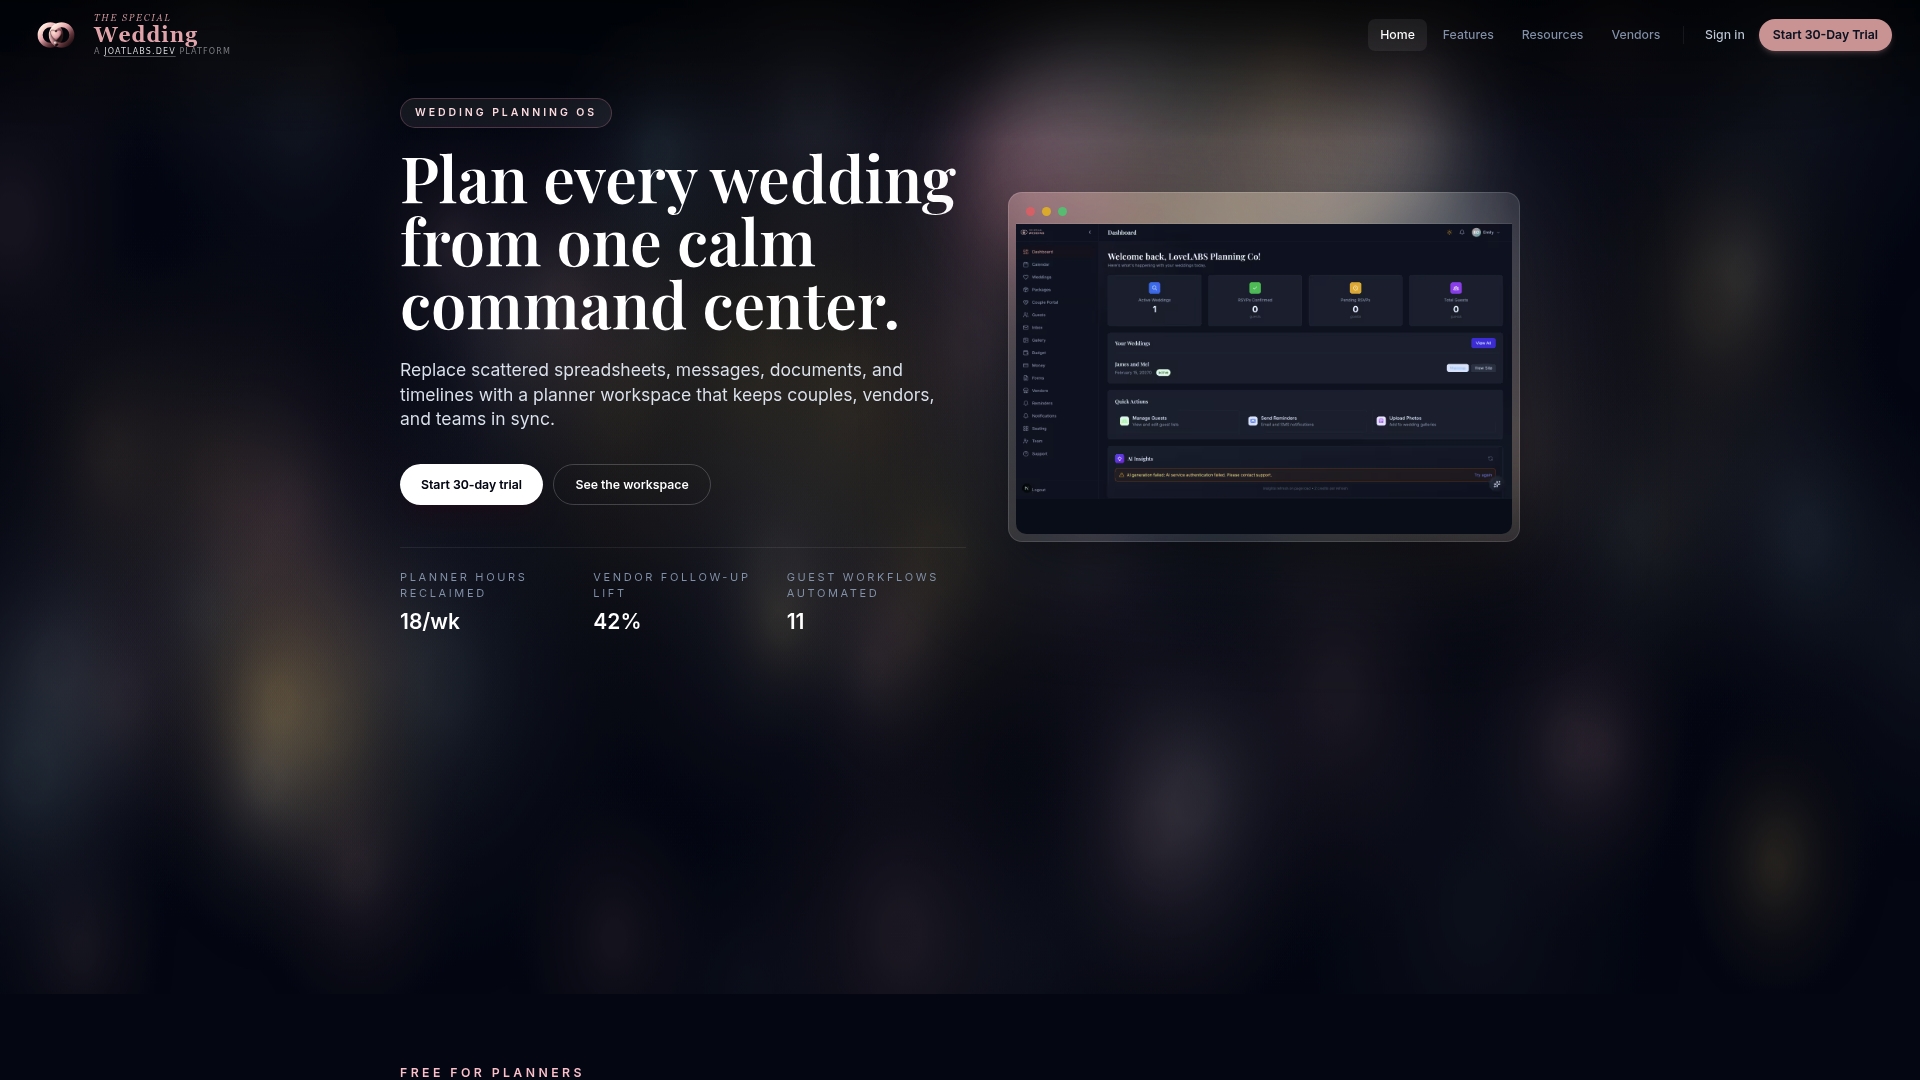
The platform maps directly to the workflow above: master templates with time variables, role-based editing and approval controls, vendor portal access with scoped permissions, and Google/Outlook calendar sync. A 30-day pilot is enough to configure your master template, run one full wedding through the six-step workflow, and measure your SLA delivery rate. Vendors like Genesis Master of Events are already listed on the platform, so your vendor onboarding starts with a directory rather than a blank contact card. Start your free trial at Thespecialwedding and run your first pilot wedding through the full workflow this month.
Sources
- The ROI of AI Automation for Wedding Planning Businesses | OS For Your Business
- Best App for Wedding Planners: Professional Planning Software
- Project Management for Wedding Planners in 2026
- How to Coordinate a Flawless Event Supplier Timeline from Booking to Breakdown - The Cameron Journal
Recommended
- Automated Wedding Day Timeline: What Couples Need to Know | The Special Wedding Blog
- Shared Wedding Event Schedule: Build One That Works | The Special Wedding Blog
- How to Share Wedding Event Timeline with Vendors | The Special Wedding Blog
- Wedding Timeline Template Examples for a Stress-Free Day | The Special Wedding Blog
Free wedding planner templates
Skip the blank page — these templates ship with the form fields you actually need.
Browse all 9 free templates →