Wedding Event Seating Coordination Tips That Work
Wedding Event Seating Coordination Tips That Work

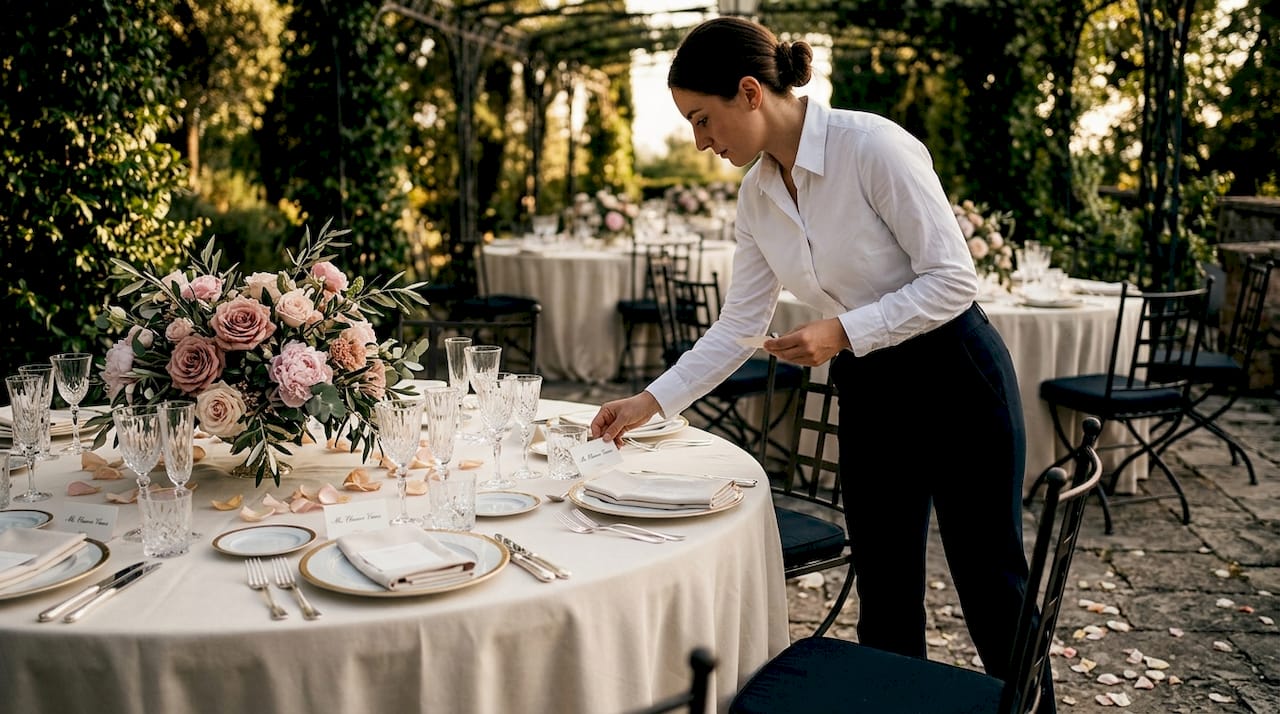
Walking into a wedding reception and finding your seat without confusion sounds simple. It rarely is. Behind every smooth guest experience sits hours of careful planning, and the seating arrangement is where most of that invisible work lives. These wedding event seating coordination tips will walk you through every stage, from building your guest list to handling the surprises that show up on the day itself. Whether you’re managing 40 guests or 200, the same core principles apply.
Table of Contents
- Key Takeaways
- 1. Gather and organize your guest list before anything else
- 2. Choose the right table types and floor plan for your venue
- 3. Place VIPs and close family first
- 4. Use buffer seats to protect your plan
- 5. Handle last-minute seating changes by the clock
- 6. Design signage that moves guests without confusion
- My take on seating coordination
- Plan your wedding seating with the right tools
- FAQ
Key Takeaways
| Point | Details |
|---|---|
| Start the seating chart early | Begin 4 to 6 weeks out and finalize 1 to 2 weeks before the event to reduce last-minute rework. |
| Use a two-stage assignment process | Assign tables first, then lock individual seats after your RSVP deadline passes. |
| Build in buffer seats | Leave 1 to 2 open seats per table to absorb surprise additions without major reshuffling. |
| Handle changes by time window | Do a full reshuffle 72+ hours out; limit moves to single changes under 24 hours before the event. |
| Make signage effortless to read | Post an alphabetical seating chart near the entry so guests find their tables without creating a bottleneck. |
1. Gather and organize your guest list before anything else
Before you touch a seating chart, you need a clean, accurate guest list. This sounds obvious, but many couples start building their wedding seating arrangement before RSVPs are confirmed, which creates double the work when changes roll in.
Collect the following details for every guest:
- Full name (exactly as it will appear on place cards and the chart)
- Plus-one status and the guest’s name if confirmed
- Meal preference or dietary restriction
- Mobility or accessibility needs
- Relationship to the couple (immediate family, extended family, college friends, coworkers, etc.)
Once you have that data, group your guests into clusters based on how they know each other. Family from the same side naturally belongs together. College friends who all attended the same school will have an easier time at a shared table. Coworkers who have never met your cousins will feel more comfortable among people they actually recognize.
Pro Tip: Create a notes column in your tracking spreadsheet for each guest. Flag anything that matters for seating, such as a gluten allergy that affects meal service, a guest who uses a wheelchair, or two people who had a falling out. You will not remember every detail on the day you finalize seats.
Start your seating chart 4 to 6 weeks before the wedding and finalize it 1 to 2 weeks prior. This timing ties your chart to confirmed RSVPs instead of estimates.
2. Choose the right table types and floor plan for your venue
The physical layout of your reception space shapes every decision you make about how to arrange wedding seating. Tables are not interchangeable. Each type creates a different social dynamic, and the wrong choice for your venue can leave guests uncomfortable regardless of how well you group them.
| Table type | Best for | Considerations |
|---|---|---|
| Round (60-inch) | Groups of 8; encourages all-table conversation | Requires more floor space; works well for mixed groups |
| Long rectangular | Family-style meals; close-knit groups | Guests at opposite ends rarely talk; better for people who know each other |
| Sweetheart table | Couple only; creates intimacy and visual focus | Keeps couple separate from guests during dinner |
| King’s table | Couple + wedding party together | Requires very long head table; limits couple’s movement |
Round tables typically seat 8 comfortably at 60 inches in diameter, and spacing between tables should be at least 60 inches to allow comfortable movement and service. Anything tighter creates congestion and makes service staff work around guests rather than alongside them.
When you think about event seating layout tips, traffic flow matters as much as table size. Guests need a clear path from the entrance to their table, from their table to the bar, and from the bar to the dance floor. Walk the space yourself before you finalize placement.
Pro Tip: Ask your venue coordinator for a to-scale floor plan, or use a digital tool to drop tables into the space before the wedding day. Seeing the layout on screen will catch spacing problems that are invisible on paper.
Place guests with mobility needs or older relatives close to the entrance, restrooms, and the main action. Carrying a full plate across a long room is difficult for anyone. Making it easy shows consideration.
3. Place VIPs and close family first
Every wedding seating arrangement starts with the same group: your VIPs and immediate family. VIPs and close family deserve prime placement with optimal views of the head table and dance floor. Anchor these guests first, then build the rest of your chart around them.
Here is a proven sequence for table assignment strategies that keeps the process manageable:
- Seat the couple (sweetheart or head table)
- Seat both sets of parents and immediate siblings
- Seat grandparents and elderly relatives near easy access points
- Seat wedding party members at or near the head table
- Seat close friends and extended family next
- Fill remaining tables with acquaintances, coworkers, and plus-ones
This order matters because your VIP tables set the spatial anchor for the room. Once parents and grandparents are placed, you know which direction the room flows and where remaining groups should land.
Assign tables before you assign individual seats. This two-stage process gives you flexibility. You can move entire groups without disrupting individual seat assignments until after your RSVP deadline passes.
When handling sensitive guest situations, think in terms of distance and distraction. Divorced parents who do not get along should sit at separate tables with other people between them, not at opposite ends of the same table. Feuding guests separated by multiple tables rarely create reception drama. The goal is enough physical and conversational distance that neither party feels watched or provoked.
Avoid creating a catch-all table for guests who do not fit elsewhere. Distributing singles across tables with common interests keeps every guest connected. A solo guest seated with seven strangers who share no history with them or with each other is the seating arrangement equivalent of being forgotten.
4. Use buffer seats to protect your plan
One of the most underused guest seating ideas is simple: leave intentional gaps. Buffer seats, meaning 1 to 2 open spots per table, allow you to absorb late additions or surprise cancellations without rebuilding entire sections of your chart.
Not every table needs a buffer. Prioritize them at tables where plus-one confirmations were uncertain, near family tables where an extra relative might show up, and at any table where the final count was close to capacity. Leaving buffers at tables with confirmed, long-term guests wastes flexibility where you do not need it.
This practice connects directly to how your overall guest seating ideas evolve from a static plan into a living document. The chart you print two weeks out will not match the room exactly. Expecting that and planning for it is the difference between a calm coordinator and a stressed one.
5. Handle last-minute seating changes by the clock
Last-minute changes are not an exception. They are a feature of every wedding. Someone cancels the morning of. A plus-one shows up unannounced. Two guests who RSVP’d separately arrive together and want to sit with each other.
Your response should match how much time you have. Handle changes based on your time window before the event:
- 72 or more hours out: Do a full reshuffle if needed. You have enough time to reprint charts, reassign tables, and notify your venue coordinator without stress.
- 24 to 72 hours out: Make targeted moves only. Change one cluster at a time and update your digital file immediately after each change.
- Under 24 hours out: Single changes only. One change at a time prevents the cascading effect where fixing one seat breaks three others.
- Day of: Defer to your day-of coordinator or a trusted helper. The couple should not be managing seat swaps during cocktail hour.
Pro Tip: Pack an emergency seating kit the night before. Include printed table cards, blank escort cards, a fine-point marker, tape, scissors, and a printed copy of your final seating chart. Your coordinator can solve almost any problem on the spot with those five items.
Digital seating tools make last-minute edits dramatically faster than paper charts. When you need to move a guest, you update one file and reprint one card instead of crossing out and rewriting by hand.
6. Design signage that moves guests without confusion
Your seating chart sign is the first thing guests look for when they walk into your reception. How it is displayed determines whether guests flow smoothly to their seats or create a traffic jam at the entrance.
Post your seating chart where guests can scan it while still moving. A sign positioned directly in a doorway forces guests to stop in the entrance, blocking everyone behind them. Place it off to one side, ideally visible from several feet away, so guests can approach, scan, and move on without stopping foot traffic.
A few practical signage decisions that matter more than most couples realize:
- List guests alphabetically by last name, not by table number. Guests know their own name. They do not know their table number until they read it.
- Post the chart near the entry so guests find their seats quickly without searching the room.
- Use the same name format on your chart, your place cards, and your escort cards. If your invitation said “Dr. and Mrs. James Torres,” your card should say the same thing. Mismatched names create genuine confusion.
- Coordinate with your venue coordinator and any day-of staff so everyone knows the flow before guests arrive.
If your reception includes escort cards at a separate table, place that station after the seating chart, not before it. The chart tells guests their table. The escort card confirms it and travels with them.
My take on seating coordination
I’ve watched couples spend weeks agonizing over seating and still walk into their reception anxious about whether it will work. What I’ve learned is that most seating disasters trace back to two things: waiting too long to start and treating the chart as finished when it is really just drafted.
The emotional weight of seating decisions is real. Deciding where divorced parents sit, how to handle feuding cousins, or where to place a friend who does not know anyone else at the wedding carries genuine stakes. But I’ve found that most of those situations resolve cleanly when you give yourself enough time to think them through calmly rather than under deadline pressure.
What actually works is building flexibility into the plan from the start, delegating day-of execution to someone you trust completely, and deciding in advance that the couple’s job on the wedding day is to be present, not to manage logistics. Hand off the seating kit, step away, and trust the plan you built.
— JOATLABS
Plan your wedding seating with the right tools
Coordinating seating across a guest list of any size gets complicated fast. Thespecialwedding brings together guest management, seating charts, vendor coordination, and event timelines in one place, so you are not jumping between spreadsheets, texts, and printed lists to keep track of everything.
If you are looking for professional planning support, the Thespecialwedding vendor directory connects you with experienced local planners, rental companies, and venues who handle seating logistics regularly. For couples who want an integrated planning workspace, Thespecialwedding’s platform gives you the tools to manage your guest list, seating chart, and vendor communication without losing track of where anything stands.
FAQ
When should you start planning your wedding seating chart?
Start your seating chart 4 to 6 weeks before the wedding and finalize it 1 to 2 weeks before the event. This timeline gives you time to work from confirmed RSVPs rather than estimates.
How many guests should sit at a round wedding table?
A standard 60-inch round table seats 8 guests comfortably. Spacing between tables should be at least 60 inches to allow for guest movement and server access.
Should you assign individual seats or just tables?
Assign tables first, then lock individual seats after your RSVP deadline. This two-stage approach reduces reshuffling and gives you more flexibility as guest counts shift.
How do you handle divorced or feuding guests at a wedding?
Seat them at separate tables with other guests between them. Enough physical and conversational distance keeps both parties comfortable and prevents tension from affecting other guests nearby.
What goes in a day-of seating emergency kit?
Pack printed table cards, blank escort cards, a fine-point marker, tape, and a printed copy of your final seating chart. A trusted coordinator or helper can resolve almost any seating issue with those basics on hand.
Recommended
Free wedding planner templates
Skip the blank page — these templates ship with the form fields you actually need.
Browse all 9 free templates →