Wedding Timeline Template Examples for a Stress-Free Day
Wedding Timeline Template Examples for a Stress-Free Day
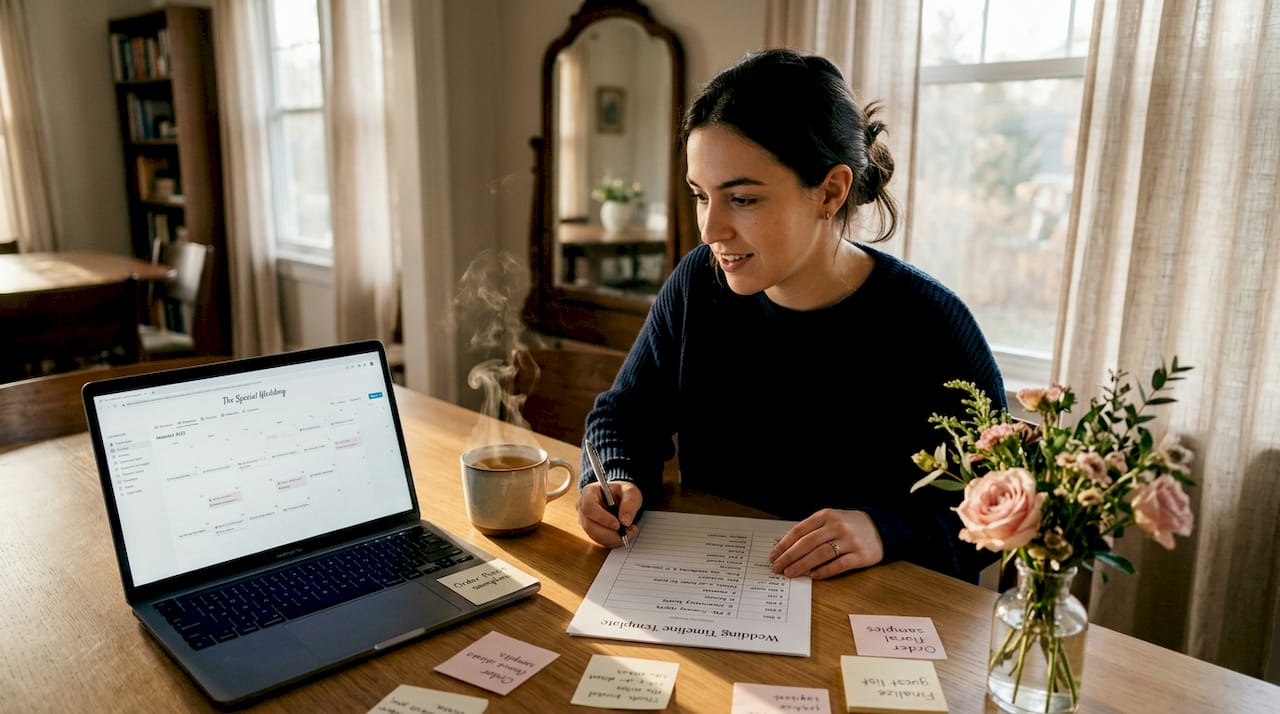
A wedding timeline template is a structured, hour-by-hour schedule that organizes every moment of your wedding day, from the first hair appointment to the final send-off. Without one, even the most carefully planned weddings fall apart at the seams. Platforms like The Knot, Canva, and Bliss & Bone all offer wedding timeline template examples precisely because couples who use them report far less day-of chaos. The core value is not just organization. It is the confidence that every vendor, family member, and wedding party participant knows exactly where to be and when.
1. What wedding timeline template examples must include
The best bridal timeline samples share a common architecture. They break the day into distinct blocks, assign realistic durations, and build in recovery time for the inevitable delays. Typical wedding day blocks run as follows: getting ready (4 to 5 hours), first look and portraits (1 to 2 hours), ceremony (20 to 30 minutes), cocktail hour (1 hour), reception (3 to 4 hours), and send-off (10 to 15 minutes). That breakdown gives you a working skeleton before you add a single vendor name.
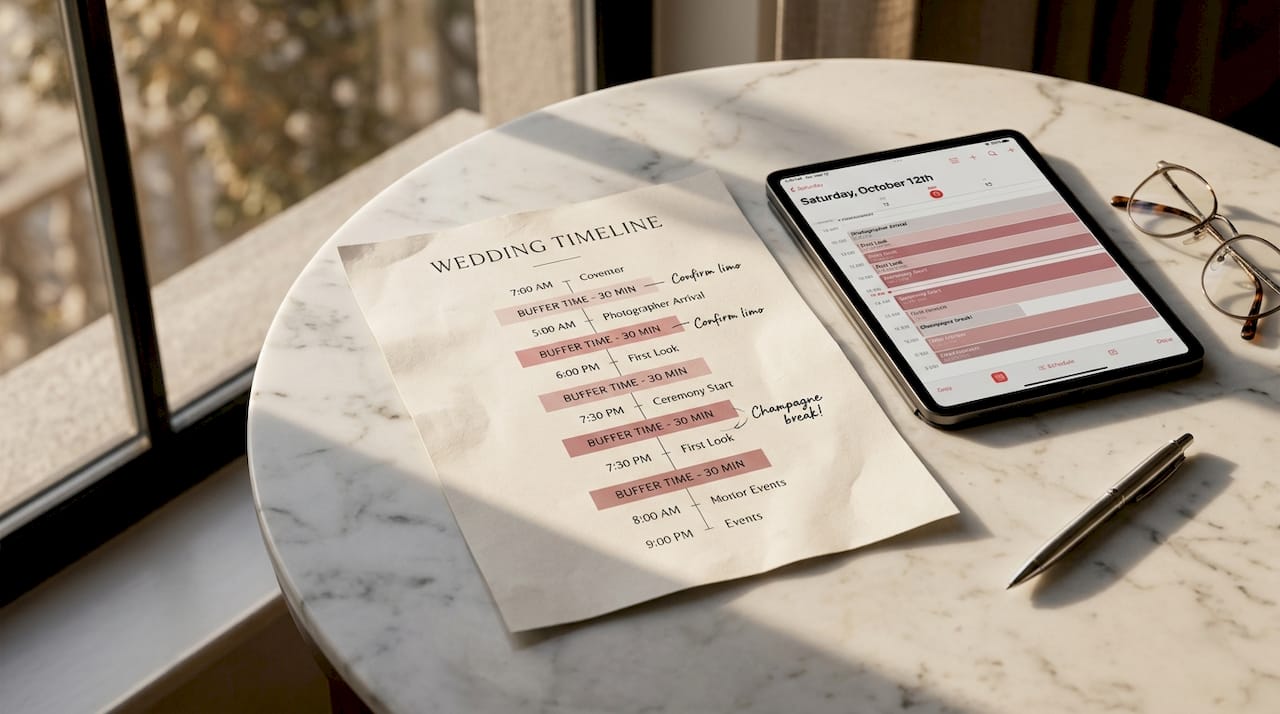
Buffer time is the most underused tool in wedding day scheduling. Buffer times of 15 to 30 minutes between major blocks prevent one late vendor from cascading into a delayed ceremony. Hair and makeup are the most common culprits. Chris Ramsay of WellChosenWeddings recommends adding a full 30-minute pad after hair and makeup specifically because overruns there compress every block that follows.
Vendor arrival times deserve their own line items, not a footnote. Reputable timeline templates from sources like Elisabeth Kramer itemize photographer, videographer, caterer, florist, and officiant arrival times separately rather than grouping them under a generic “vendor setup” block. That specificity prevents the scenario where two vendors show up at the same door at the same time with no one directing traffic.
Pro Tip: Add a “Responsibility” column to your timeline. Knowing who owns each block, whether that is your coordinator, maid of honor, or venue manager, eliminates the confusion that causes transitions to stall.
2. How ceremony start time shapes your entire schedule
Your ceremony start time is the anchor point of your detailed wedding itinerary. Every other block is calculated forward or backward from that single moment. A 4 p.m. ceremony with a first look typically means hair and makeup begins around 9 or 10 a.m. A 6 p.m. ceremony without a first look compresses portrait time and shifts everything later.
Bliss & Bone offers time-blocked samples for 2 p.m., 3 p.m., 4 p.m., and 5 p.m. ceremony starts, each with and without a first look option. That flexibility matters because a 2 p.m. ceremony in July creates golden-hour portrait pressure that a 5 p.m. October ceremony simply does not. Choosing the right scenario template from the start saves hours of manual recalculation.
Here is how to build your schedule from a ceremony anchor:
- Lock your ceremony start time first.
- Subtract 20 to 30 minutes for guest seating before the ceremony begins.
- Add your ceremony duration (typically 20 to 30 minutes) to find your cocktail hour start.
- Work backward from ceremony time to schedule portraits, first look, and travel.
- Work further backward to set hair and makeup start, including the 30-minute buffer.
- Add vendor arrival windows at least 30 to 60 minutes before each vendor is needed on camera or in position.
- Confirm sunset time for your date and location to protect golden-hour portrait windows.
Pro Tip: Protecting golden-hour windows with a dedicated 15-minute buffer before key portrait sessions prevents lighting compromises when earlier events run long. Build that buffer in before you share the timeline with your photographer.
3. Sample 4 p.m. ceremony timeline
This is the most requested format in wedding planning, and for good reason. A 4 p.m. ceremony balances daylight for portraits with an evening reception that feels natural. Here is a working example of a detailed wedding itinerary built around that anchor.
| Time | Event | Notes |
|---|---|---|
| 9:00 a.m. | Hair and makeup begin | Bride first; bridesmaids rotate |
| 12:30 p.m. | Hair and makeup complete | 30-minute buffer built in |
| 1:00 p.m. | First look and couple portraits | 60 to 90 minutes with photographer |
| 2:30 p.m. | Wedding party portraits | Separate from couple session |
| 3:00 p.m. | Couple hidden; guests begin arriving | Coordinator manages flow |
| 3:30 p.m. | Guest seating begins | Guests seated 20 to 30 minutes early |
| 4:00 p.m. | Ceremony begins | 20 to 30 minutes duration |
| 4:30 p.m. | Cocktail hour begins | Couple joins after family formals |
| 5:30 p.m. | Grand entrance and dinner | Reception program begins |
| 9:30 p.m. | Last dance and send-off | 10 to 15 minutes for exit |
A few details make this template work in practice:
- Caterer and bar staff arrive by 11 a.m. for setup, well before the first guest.
- Florist delivers and installs ceremony florals by 2 p.m.
- Photographer arrives at 9 a.m. to document getting-ready moments.
- Officiant arrives by 3:45 p.m. for a final run-through.
Templates covering the full wedding day arc, from getting ready through grand exit, serve couples and vendors far better than ones that only address ceremony and reception. The getting-ready block is where most timelines fall apart, and it is the block most often left vague.
4. Sample 6 p.m. ceremony timeline
An evening ceremony shifts the entire event planning timeline later and changes the portrait strategy significantly. Without a first look, you lose the pre-ceremony portrait window and must schedule all couple portraits during cocktail hour, which cuts into your time with guests.
- 12:00 p.m.: Hair and makeup begin
- 3:30 p.m.: Hair and makeup complete, with buffer
- 4:00 p.m.: Bridal party portraits (no couple portraits yet)
- 5:00 p.m.: Couple separated; guests begin arriving
- 5:30 p.m.: Guest seating begins
- 6:00 p.m.: Ceremony begins
- 6:30 p.m.: Ceremony ends; cocktail hour begins
- 6:30 to 7:15 p.m.: Couple portraits during cocktail hour
- 7:30 p.m.: Grand entrance and dinner
- 10:30 p.m.: Last dance and send-off
The tradeoff is real. First looks enable couples to complete portraits before the ceremony, which means they attend their own cocktail hour fully present instead of disappearing for 45 minutes of photos. If attending cocktail hour matters to you, a first look is the scheduling solution, not just a sentimental choice.
5. Comparing template formats: PDFs, Google Sheets, and digital planners
Not all wedding timeline template examples are created equal. The format you choose affects how easily you can update, share, and collaborate on your schedule as the day approaches.
| Format | Best for | Limitations |
|---|---|---|
| Printable PDF (The Knot, Bliss & Bone) | Quick reference on the day | Not editable; requires reprinting for changes |
| Editable Google Sheets | Collaborative editing with vendors | No automatic notifications; version control issues |
| Canva templates | Visual presentation for wedding party | Limited data fields; not built for logistics |
| Digital planning platforms | Full vendor coordination and sharing | Requires setup time; best for planners managing multiple events |
Free downloadable templates from The Knot and Bliss & Bone work well for couples who want a starting point fast. The limitation is that they are static. Once you share a PDF with eight vendors and then change the ceremony time by 30 minutes, you are sending eight updated PDFs and hoping everyone reads the new version.
Sharing your timeline in collaborative formats with vendors and coordinators is the practice that separates smooth wedding days from chaotic ones. Elisabeth Kramer and EventRundown both emphasize that timeline distribution is not a one-time task. It is an ongoing communication process that continues through the final week before the wedding.
Assigning responsibility columns within your template, as Knot & Plot’s insider templates do, adds another layer of accountability. When every block has an owner, changes get routed to the right person immediately instead of creating confusion about who is responsible for follow-up.
Pro Tip: Send your final timeline to all vendors no later than one week before the wedding. Include a brief note asking each vendor to confirm receipt and flag any conflicts. That single step catches 90% of scheduling conflicts before they become day-of problems.
Key takeaways
A well-structured wedding timeline template is the single most effective tool for preventing day-of delays, and it works only when it includes buffer times, vendor-specific arrival windows, and a clear responsibility assignment for every block.
| Point | Details |
|---|---|
| Build from ceremony anchor | Set your ceremony time first, then calculate every other block forward and backward from it. |
| Buffer times are non-negotiable | Add 15 to 30 minutes between major blocks and a full 30 minutes after hair and makeup. |
| First look changes everything | Choosing a first look frees up cocktail hour and gives your photographer better scheduling flexibility. |
| Itemize vendor arrivals | List each vendor’s arrival time separately to prevent logistical conflicts during setup. |
| Share and confirm | Distribute your final timeline to all vendors at least one week out and request confirmation from each. |
Why most wedding timelines fail before the day even starts
The timelines that fall apart on wedding days almost always have one thing in common: they were built around best-case scenarios. Every block assumes the previous one finished on time. Hair and makeup take exactly as long as quoted. The photographer arrives at the minute listed. That is not how real weddings work.
The templates I find most useful are the ones that treat buffer time as a structural element, not an afterthought. When you build 15 to 30 minutes of recovery time between every major block, you are not being pessimistic. You are being realistic about the fact that 150 people, a dozen vendors, and one very emotional day will not execute with military precision.
The first look debate is worth addressing directly. Many couples resist it for traditional reasons, and that is a valid choice. But from a pure scheduling standpoint, a first look is the most efficient decision you can make. It moves 60 to 90 minutes of portrait time before the ceremony, which means your cocktail hour stays intact and your guests are not waiting for you to reappear. If you want to be present at your own party, the first look makes that possible.
I also think couples underestimate how much the coordinator’s role in vendor scheduling affects timeline execution. A coordinator who has pre-confirmed every vendor arrival time, walked the venue layout, and distributed a responsibility-assigned timeline is worth more than any template. The template is the plan. The coordinator is the person who executes it when reality diverges from the plan, and it always does.
Build your timeline with flexibility in mind. Round event durations to the nearest 15 minutes rather than scheduling in five-minute increments. Thinking in terms of event flow rather than strict minute-by-minute scheduling gives your day room to breathe without losing structure entirely.
— JOATLABS
Plan your wedding day with the right vendors behind you
A great timeline only works when the vendors behind it are reliable, communicative, and experienced. Thespecialwedding’s vendor directory connects you with photographers, caterers, DJs, florists, and venues who understand how to work within a structured wedding day schedule. Every vendor listed has the professional experience to honor your timeline and flag conflicts before they become problems. If you want professional planning support to build and execute your timeline from start to finish, Thespecialwedding has planners ready to help. Start with the directory and build your vendor team around a timeline that actually works.
FAQ
How long should a wedding day timeline be?
A full wedding day timeline typically spans 12 to 14 hours, from the first hair and makeup appointment through the final send-off. Typical blocks include getting ready (4 to 5 hours), portraits (1 to 2 hours), ceremony (20 to 30 minutes), cocktail hour (1 hour), and reception (3 to 4 hours).
How far in advance should I create my wedding timeline?
Build your first draft at least three to four months before the wedding, then finalize and distribute it to all vendors one week before the date. Early drafting gives you time to identify conflicts and adjust vendor arrival windows before they become fixed commitments.
Do I need a first look to have a good photo timeline?
A first look is not required, but it significantly improves scheduling flexibility. First looks allow couple portraits before the ceremony, freeing up cocktail hour for the couple to attend and reducing pressure on the photographer during the reception.
What is the most common mistake in wedding day schedules?
The most common mistake is omitting buffer time between major blocks. Without 15 to 30 minutes of buffer between events, a single overrun in hair and makeup can delay the ceremony, compress cocktail hour, and push the entire reception schedule back.
Should I share my timeline with all vendors?
Yes, and you should request confirmation from each one. Sharing your timeline with every vendor, including your venue, caterer, photographer, and DJ, is the most direct way to prevent miscommunication and keep all parties aligned on the day’s schedule.
Recommended
- Automated Wedding Day Timeline: What Couples Need to Know | The Special Wedding Blog
- Wedding planning time management: a pro guide for planners | The Special Wedding Blog
- How to Share Wedding Event Timeline with Vendors | The Special Wedding Blog
- Solo Wedding Planner Organization Tips That Work | The Special Wedding Blog
Free wedding planner templates
Skip the blank page — these templates ship with the form fields you actually need.
Browse all 9 free templates →